Unit deep dive · Armies
Archers
The shooting arm — strikes from beyond the melee and never strikes back. Softens a line before contact, shatters if the enemy reaches it. Raised only where woodland domains stand.
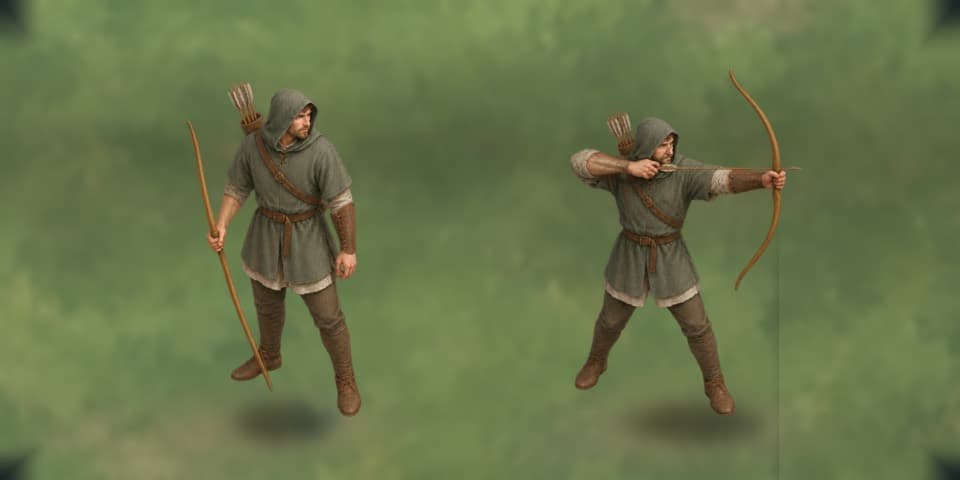
What it is
Archers are the campaign's shooting arm: bowmen drawn from woodland domains, trained to loose together and fall back rather than stand. They are the only troops who decide a fight without touching it — and the only troops with no answer at all once an enemy is among them.
Why it matters
Fire from beyond the melee
An Archer formation attacks at range, over the heads of friends and into formations that cannot reply. That is their whole value: a defended line under sustained fire is worn down before it is ever charged, and a wounded formation — any wounded formation — hits softer for the rest of the fight.
Ranks sharpen the shooting rather than the bow-arm's brawn. A Seasoned formation that stands still and aims volleys instead of skirmishing shoots truer; a Veteran formation carries longbows and reaches ground no one else can touch, though the longest shots land lighter.
The woodland specialty
Only castles whose domains carry woodland raise Archers — every woodland holding is a specialist objective, worth taking for the bow line alone and worth denying to a rival for the same reason.
They cost more than Footmen to raise and more again to keep, and they are fragile in the open. An army of nothing but Archers loses any battle it cannot decide at range; an army with none can be shot apart at leisure by one that has them.
How it works
The bow and its limits
Their craft is the massed loose: bow, bracer, and the discipline to shoot on command. In the rules this is an attack that lands at range — and a defence that is the softest of the active roster. Their rank growth sharpens ranged fire specifically; an Archer formation pressed to adjacent attacks fights at the plain base line, no matter its rank.
Two hard limits define them. They never retaliate: a melee blow survived goes unanswered. And they cannot batter structures — a gate must be broken by someone else's shoulder.
Mobility
On the campaign map Archers march at the common pace of all companies — the bow does not slow a march, and horses do not speed one. On the field they move at the common fighting pace, no faster despite their light kit, which is why screening matters more than speed for them.
Resilience and recovery
A fresh formation enters the field at full health like any other; what it lacks is defence, so each blow that lands tells harder. Wounds reduce their outgoing fire like anyone's — a shot-up Archer formation shoots with a limp.
Readiness bands, rest, and replenishment work for them exactly as for the line: survivors classify by final health, recover one band per resting owning turn, and lasting strength returns only through replenishment at a secured castle that raises Archers — a woodland holding, in other words.
Strengths and vulnerabilities
Strengths: damage dealt without damage taken, at reach nothing else matches; the longest effective strikes in the war once the Longbow rank is reached; and a low wage bill next to horse.
Vulnerabilities: everything melee. Caught in the open they do not strike back; caught in a wood's cover they at least defend better, but caught at all they die in trade. Their own sight lines betray them too — a formation posted behind intervening forest or high ground might as well not be posted.
Sight lines and ground
Archer fire follows the line of sight: intervening woods and high ground block a shot entirely, while formations — friend or foe — never do. Open fields give clean killing ground; broken country gives none.
Ground helps them twice when they are the defender: forest and hill cover blunt the enemy's strikes against them. The doctrine is to shoot from open ground behind a friendly line, and to stand on defended ground when the enemy has the shooting.
Deployment and combinations
The classic order is Archers behind Footmen: the line fixes the enemy and absorbs the charge, the Archers shoot the stalled formation apart. Against an enemy line that will not come, the same pair works in reverse — shoot them until they must.
Mass them where they can see and be seen by nothing: on the flanks of a brace line, inside a wall's parapets, or at a crossing's edge where the enemy must funnel. A held volley — fire from a formation that has not moved — is stronger than skirmish fire, so let the enemy walk onto the arrows rather than chasing with the bow.
Common mistakes
Shooting through the wrong ground. Woods and hills between the Archer and the target mean no shot at all; check the line before committing the formation's activation.
Moving, then expecting the aimed volley. The volley's edge belongs to a formation that has not spent movement — move or shoot well, not both. Skirmishing an adjacent enemy with a Veteran formation is the other classic error: adjacent fire fights at the base line and throws away every rank of practice. And leaving Archers without a screen: a single cavalry formation that reaches them removes them from the war, because they will never strike back.
Rules, exactly
Exact values from the current build — not advice, not flavour.
- Recruitment cost
- 60 gold — paid when the muster order starts, consuming one formation from the castle's local reserve
- Upkeep
- 3 gold per turn — fielded, garrisoned, and mustered troops waiting at the walls alike
- Muster time
- 1 turn — owning turns of work; the troops then wait ready at the walls
- Raised at
- Woodland domains — the castle's domain must carry the woodland tag
- Base attack
- 3 — campaign base at Recruit (L1); archer rank attack applies to ranged fire only — an adjacent attack keeps the base line
- Base defence
- 2 — campaign base at Recruit (L1); ranks raise it in battle (see Rank growth)
- Tactical movement
- 3 hexes per activation — fields and crossings cost 1 to enter, woods and hills 2
- Attack range
- 1–3 hexes
- Retaliation
- None — archers never strike back when caught in melee
- Gate battering
- Cannot batter — against the marked gates of a fortress assault
- Battle health
- 10 — a fresh formation; readiness and strength scale entry health
- Ranks
- Recruit (L1) → Elite (L5) — a rank's threshold is lifetime experience; Elite holds 850 XP
- Rank growth
- attack ×1.00 → ×1.20, defence ×1.00 → ×1.10 — level multipliers on the Recruit base, per Trained (L2) upward
- Outfitting gold
- 25 gold / 45 gold / 75 gold / 125 gold — by target rank Trained (L2) → Elite (L5), paid with a promotion
- Paid training
- reaches Seasoned (L3) — 0.5 gold per missing XP point; higher ranks are earned in battle only
- Aimed volley
- from Seasoned (L3) — ×1.1 ranged damage when the formation has not moved first this activation
- Longbow
- from Veteran (L4) — maximum range extends to 4 hexes; shots at that distance ×0.8 (×0.9 once Elite)
- Readiness bands
- Ready 10 · Shaken 8 · Depleted 6 — entry health per band; battle survivors classify by final health, and beyond 1 turn of unpaid wages each further unpaid turn drops every formation one band
- Readiness recovery
- 1 band per resting owning turn — resting is idle in a stable friendly castle, or supplied and idle in the field; it is free and never restores strength
- Replenishment
- up to 25 strength points per owning turn — only a replenishment order at a secured castle that raises archers; gold and local reserve pay for what is restored, and rank is untouched