Unit deep dive · Armies
Footmen
The universal line troop — matched attack and defence, raised at any secured castle, with a brace that stops a cavalry charge cold.
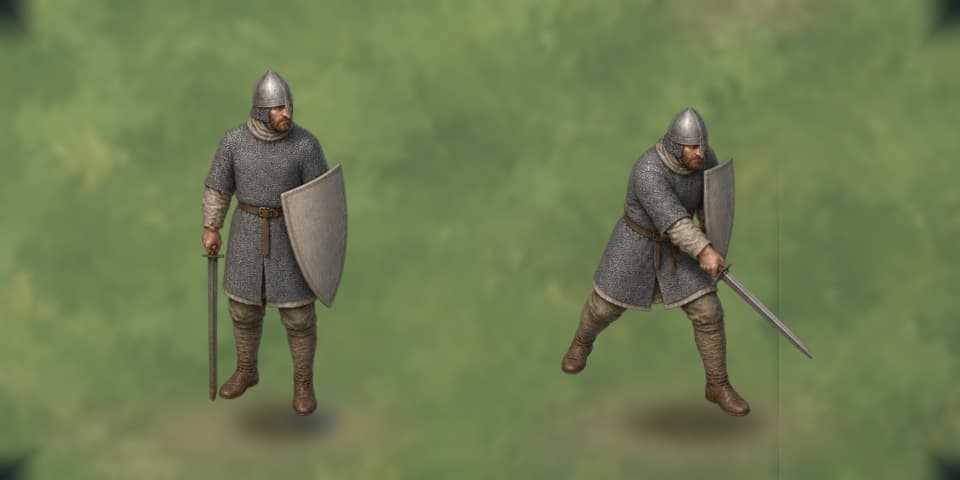
What it is
Footmen are line infantry: close-order soldiers who fight with hand weapon and shield, drilled to stand shoulder to shoulder and keep the ground they are given. Every secured castle can raise them, whatever its domain grows or grazes, which makes them the troop every commander can always raise — and the shape every army takes first.
Why it matters
The line that holds
A Footman formation is the army's centre of gravity. Its attack and defence stand equal at base — no active fighting type stands firmer, and only Engineers match that balance, who never grow stronger with rank. When a melee blow lands and the formation survives, it strikes back at once, weaker than a full attack but felt all the same.
Their signature act is the brace. A braced line digs in and ends its activation to meet a charge: cavalry running at open ground lose their whole charging bonus against it. Every Footman rank can brace, from the freshest Recruits upward, so even a newly mustered army has an answer to horse.
The spine of every muster
Because any secured castle raises them, Footmen are the army's arithmetic: the cheapest troops of the active roster to raise and to keep, quick to muster, and present wherever you hold walls. Specialists are additions to a Footmen core, not replacements for it — and local levies who convert to professional service become Footmen, feeding the same spine from the towns themselves.
Garrison work, screening duty, gate-battering when no Engineers are at hand: whatever the war asks on a given day, some of it falls to Footmen, and they are the type you can always afford to have standing ready.
How it works
Arms and armour
Their craft is the shield wall: hand weapons, tall shields, and the discipline to hold formation rather than chase the fight. In the rules this reads as an even hand — attack and defence matched at base, no ranged weapon, no charging dash of their own.
Footmen resilience is not a special armour class; it is that level defence, the cover of the ground they stand on, and the brace. Nothing in the rules lets them shrug off a blow that lands — they simply give less ground than anyone else when it does.
Mobility
On the campaign map, all companies march at one common pace — Footmen neither hurry nor lag behind any other troop on the road, and a grouped banner moves at the pace of its slowest member. Woods and hills cost double to enter; mountains and the river bar passage entirely except at crossings, which is where marches bend.
On the battlefield they move at the common fighting pace as well — riders cover ground faster, and no one slower is in the active roster. Movement and attack trade off within one activation: a formation may move and then attack, or move and brace, but attacking ends the activation outright.
Resilience and recovery
A fresh formation enters the field at full health, and its wounds tell two different stories. Outgoing damage falls as health falls — a battered line hits softer, though its defence never wanes, so a hurt Footmen formation still holds well. Survivors of a battle carry a readiness band — ready, shaken, or depleted — which sets the health they enter the next fight with.
Bands recover one step for each owning turn spent resting: idle in a stable friendly castle, or supplied and idle in the field. Resting is free, and it never restores strength. Battle casualties are lasting strength loss, repaired only by an explicit replenishment order at a secured castle that raises the troop — for Footmen, any of them — with rank and experience untouched throughout.
Strengths and vulnerabilities
Strengths: holding ground, screening slower and softer troops, garrison and siege work alike, an answer to cavalry at every rank, and the lowest wage bill of the roster. They are the only troops you can raise after losing everything, because every castle you still hold can raise them.
Vulnerabilities: they have no answer at range. Archers shoot them as they close, and until a Footman line reaches Elite rank, its braced shields do nothing against arrows — the brace stops horses, not shafts. Open fields belong to cavalry, where riders gain their charging bonus and Footmen have none to answer with; a Footmen attack is steady rather than shattering, and it must be delivered at arm's length.
Terrain and marching
Footmen ask nothing of the ground. Fields, roads, and crossings cost the standard step; woods and hills cost double on march and field alike, but they repay the line twice over — defending formations take less damage from cover there, and broken ground strips cavalry of the open footing their charge needs.
So the Footmen doctrine of terrain is simple: meet horse in the rough, meet archers under cover or not at all, and remember that the river and the mountains can only be crossed where a crossing admits it.
Deployment and combinations
Put Footmen where the enemy must come: in front of the archers, who cannot strike back when caught; across the lane a cavalry formation will charge down; on the wall or at the gate of a fortress assault, where any Footman formation can batter a marked gate even without siege equipment.
They pair with everyone. Archers behind a Footmen line shoot in safety; Engineers working a ram need a line to shield them; cavalry fighting beside Footmen can pick its moment, because the line fixes the enemy in place. The field itself caps how many formations stand at once per side — the rest wait as reserves and enter as the field clears, so a deep Footmen muster is never wasted.
Common mistakes
Reading base attack as promised damage. A strike's real damage also reflects the defender's defence, the cover of its ground, the attacker's wounds, and rank on both sides — the fact table's base is a starting point, not a forecast.
Bracing after the charge has already landed, or after attacking. Brace is an activation's whole ending: legal after movement, so step to the ground you mean to hold and then brace — but a formation that has attacked is spent, and a brace chosen too late meets nothing. The brace lasts until the formation's own side next acts.
Expecting the shield wall to stop arrows. Until the Elite rank, braced shields resist nothing that shoots; against massed archers, close the distance or take cover rather than stand and be shot. And letting wages slip: unpaid turns beyond the grace period erode the readiness of every formation in the army — the cheapest troops in the roster still have to be paid.
Rules, exactly
Exact values from the current build — not advice, not flavour.
- Recruitment cost
- 40 gold — paid when the muster order starts, consuming one formation from the castle's local reserve
- Upkeep
- 2 gold per turn — fielded, garrisoned, and mustered troops waiting at the walls alike
- Muster time
- 1 turn — owning turns of work; the troops then wait ready at the walls
- Raised at
- Any secured castle — no domain terrain is required
- Base attack
- 4 — campaign base at Recruit (L1); effective battle damage also reflects rank, the defender's defence, terrain, and wounds
- Base defence
- 4 — campaign base at Recruit (L1); ranks raise it in battle (see Rank growth)
- Tactical movement
- 3 hexes per activation — fields and crossings cost 1 to enter, woods and hills 2
- Attack range
- Adjacent
- Retaliation
- 60% of normal damage — a surviving melee defender's counterstrike, once per enemy side-turn
- Gate battering
- 2 structure damage per activation — against the marked gates of a fortress assault
- Battle health
- 10 — a fresh formation; readiness and strength scale entry health
- Ranks
- Recruit (L1) → Elite (L5) — a rank's threshold is lifetime experience; Elite holds 850 XP
- Rank growth
- attack and defence ×1.00 → ×1.20 — level multipliers on the Recruit base, per Trained (L2) upward
- Outfitting gold
- 20 gold / 35 gold / 60 gold / 100 gold — by target rank Trained (L2) → Elite (L5), paid with a promotion
- Paid training
- reaches Seasoned (L3) — 0.4 gold per missing XP point; higher ranks are earned in battle only
- Brace
- every rank — ends the activation; negates cavalry charges; Elite braced shields also resist ranged fire (×0.8)
- Readiness bands
- Ready 10 · Shaken 8 · Depleted 6 — entry health per band; battle survivors classify by final health, and beyond 1 turn of unpaid wages each further unpaid turn drops every formation one band
- Readiness recovery
- 1 band per resting owning turn — resting is idle in a stable friendly castle, or supplied and idle in the field; it is free and never restores strength
- Replenishment
- up to 25 strength points per owning turn — only a replenishment order at a secured castle that raises footmen; gold and local reserve pay for what is restored, and rank is untouched